Although there are clear limitations — such as needing to get closer to animals during a hunt and being at a tactical disadvantage against threats with firearms — bows do have some advantages:
- Very stealthy, almost silent
- Ammo is often reusable
- You can craft your own ammo
- The equipment is often easier to repair in the field compared to a gun, including crafting replacement parts from scratch
- Bows are usually far less regulated by the government, eg. you usually don’t need a permit
- Bows are generally less scary than guns, which might be handy in certain SHTF situations
Hunting with a bow is certainly possible, and has its own subculture of hunters. But it’s generally trickier than hunting with a gun, mainly because you have to get closer to the animal. You might need to get within 30-50 yards with a bow, compared to 300+ yards with some rifles. Plus follow-on shots are harder.
Bonus: bow hunting seasons usually come before the more crowded rifle seasons, so you get a more pleasant hunt with a higher chance of seeing game (in theory).
Similar story with self-defense: A gun is almost always a better choice than a bow in terms of the ability to protect yourself. But if you can’t or don’t want to use guns for that role, a bow could be the next best thing because you can at least still create or maintain distance between you and the threat, whereas other alternatives like knives or pepper spray require you to be closer. The right answer in that case is likely a combo of both bows and something like pepper spray.
The only time a bow would have a meaningful tactical advantage is in a fantasy Walking-Dead-style scenario or when stealth is super important. Both of which are unlikely.
Advanced preppers like having a bow around — even if it’s just as a backup — because in a long-term SHTF scenario you can craft your own ammo, parts, or even whole bows.
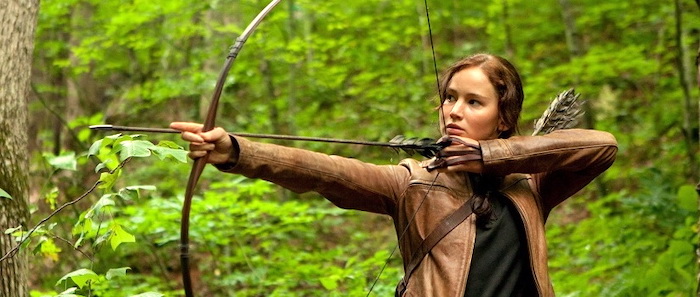
Dave Mead, a professional bowyer and bow tester, told us: “In a survival situation, I’d rather have a primitive or traditional bow by my side as they can easily be fixed, rebuilt, or replaced, which is why I think everyone should know how to make and use one.”
Just like firearms, using a bow does take practice. You shouldn’t assume you can buy one, throw it in a closet, yet be able to pick it up for the first time and be deadly accurate when an emergency comes.
But bow practice is fun, easy, and cheap! And it doesn’t take much space; even a garage or small backyard can work, as HOA rules usually don’t cover this.
The most important bits:
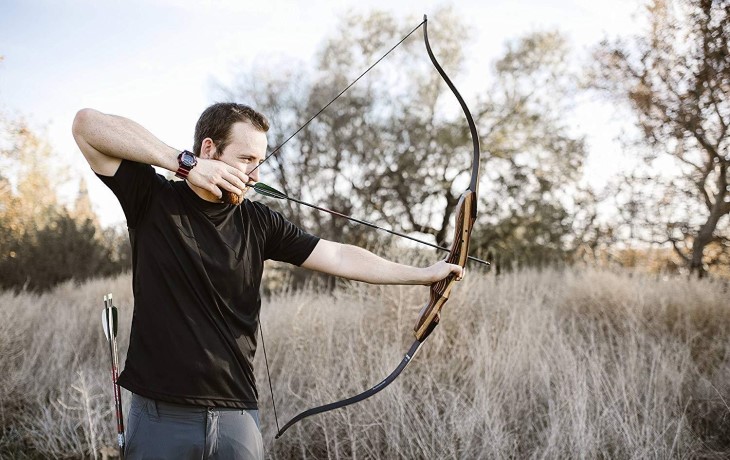
- Among the types of bows out there — longbow, recurve, compound, crossbow, etc — survival experts recommend the simpler longbow types. Picture bows from Robin Hood, not modern ones with complicated pulley systems.
- Takedown bows are models that can be broken down / folded up into a smaller package for storage and transport. A takedown model is strongly recommended so that you can easily store it in/on your go-bag and it won’t be awkward when moving around on foot.
- Look for a takedown bow with either no assembly (eg. things kind of spring into place when unlocked) or at least tool-free construction. The simpler, the better.
- Crossbows are sexy in entertainment but the vast majority of models are not practical for normal prepping due to their bulk and complexity. For example, you don’t want to be in a defense situation with a crossbow that takes a long time to reload each shot.
- Most traditional bows weigh less than 5 pounds (2.25 kg) but you can find models as light as 2 pounds (0.9 kg).
- If you’re new to archery, start with a low draw weight (ie. how hard it is to draw the string back). You can usually swap limbs on a takedown bow to increase draw weight as you progress your skills and strength.
- A lower draw weight means the arrow has less power behind it when traveling. Aim to work up to at least a 40-pound draw weight to ensure your bow is effective on game as big as deer.
- Most U.S. states require a minimum draw weight between 30 to 50 pounds to legally hunt game with a bow. Check your local laws if you intend to hunt.
- Figure out your draw length at home to make sure you’re getting the right size bow. This will also affect what length arrows you need. However, when buying survival bows, draw length is a lesser concern than portability and durability.
- A stringing tool is a worthy accessory. While bows can be strung without one, it’s easier and safer to use this cheap and light tool.
- Keep wax on your bowstring to protect it and extend its life.
Best for most:
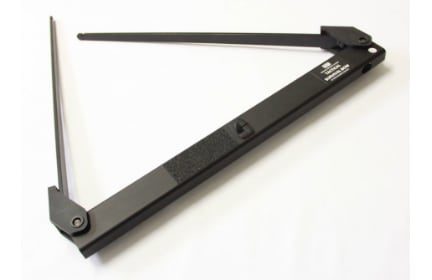
SAS Tactical Survival Bow
Although a takedown bow does sacrifice some minor performance and features for advanced archers, that likely doesn’t matter for you and the benefit of carrying a full-size bow in a tiny portable package is hard to beat for most people.
That’s why the SAS Tactical Survival Bow is the best overall choice. Even if you’re already a bowyer or you fall in love with archery after starting with this and later level-up your gear to more advanced models, it’s still worth having this takedown around.
The SAS is over 60 inches when ready to fire, yet collapses down to just 21 inches and 2.2 pounds (1 kg). When collapsed, you can store takedown arrows (they split into two halves) right inside the main compartment. No special tools are required for assembly. The riser and limbs are made from T6 aluminum, the retaining pin is made from marine-grade stainless steel, and all surfaces have been treated so they are not reflective.
Take-down arrows:
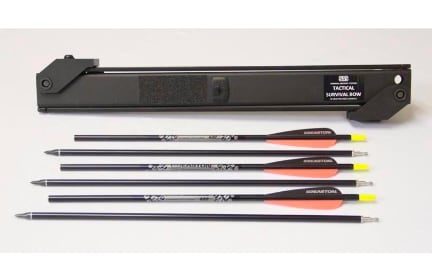
SAS Takedown Arrows
Survival Archery Systems makes its own takedown arrows (a modified Easton arrow) designed to fit inside the Tactical bow. The Tactical bow can hold three of these arrows inside. They aren’t cheap at $20 apiece, but they’re made of aluminum, so they should last.
Crossbow pistol:
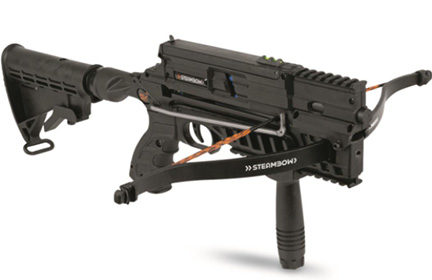
Steambow Stinger II mini crossbow
In our testing, the Stinger 2 AR-6 mini crossbow is one of the few crossbow options we’ve seen that actually fits well in preparedness. Here’s the full review. For around $330 you get a lightweight and easy-to-cock-and-fire crossbow that can fire one shot every 2 seconds with effective fire out to 50 feet in a self defense situation.
Great value:
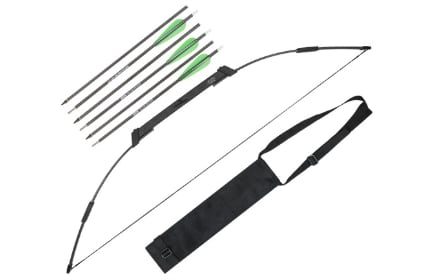
Xpectre Nomad
If you’re on a budget, you can nab the Xpectre Nomad for half the price of the SAS Tactical. It includes takedown arrows and actually breaks down into a smaller package than the SAS at just 17.5 inches. It’s also ambidextrous and includes a carrying case. The downsides are that the Nomad only comes in a 45-pound draw weight.
State-of-the-art:
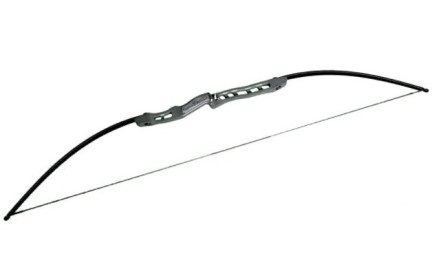
SAS Atmos
The SAS Atmos is a premium survival bow that breaks down to fit into a 22-inch backpack. The Atmos is made of 7075 aluminum and lends itself to modern sighting systems commonly found on compound bows. Unlike other survival bows, you select the draw weight upon purchase.
Contenders
Although not currently top picks, these are worth a look if you want more options:
- Keshes Takedown Recurve
- Samick Sage Takedown Recurve
- Black Hunter Takedown Longbow
- Southwest Archery Ghost Takedown Longbow
- Xpectre Rapture
- Xpectre Spectre II
Be prepared. Don’t be a victim.
Want more great content and giveaways? Sign up for The Prepared’s free newsletter and get the best prepping content straight to your inbox. 1-2 emails a month, 0% spam.
Draw weight and draw length
Archery is a complex activity, with a lot of terms and specs to wade through. But there are two you need to understand right away: draw weight and draw length.
Draw weight is simply how much force it takes to fully pull back the bowstring, expressed in pounds. Generally speaking, draw weight corresponds to the effective power of the bow.
Many states have minimum and/or maximum draw weights for hunting game because it’s unethical to hit an animal with an underpowered arrow that’s more likely to injure but not kill. Always check the laws of the state you may be taking game in to ensure that your bow is legal.
Newbies are often surprised by how hard it can be to pull back a bowstring, so don’t just assume you can handle big numbers. As a beginner, you’re better off starting off with a lighter weight and working your way up.
Complicating things is the fact that your draw length affects the draw weight.
Draw length is how far you pull back the bowstring. Draw weight is usually measured at a standard draw length of 28 inches. For each inch over that, the draw weight increases by 2.5 pounds. For each inch shorter, draw weight goes down 2.5 pounds. That’s important to keep in mind when evaluating state laws.
To determine your ideal draw length, stretch out your arms and measure from the tip of one index finger to another, then divide that by 2.5. So if the span of your arms is 70 inches, your draw length would be 28 inches.
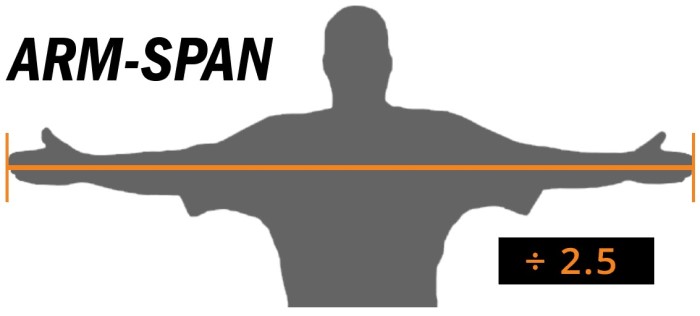
However, when buying a takedown survival bow, draw length is a lesser concern. Most of these bows only come in one draw length, so it makes more sense to focus on draw weight, the durability of the materials, and compactness.
Types of bows
Generally speaking, a bow made from a single piece of wood is a self bow, while a bow made of multiple materials is called a composite bow. Most commercial bows are composite bows. Common bow materials are wood, fiberglass, and metal.
Mead said, “My suggestions would be to get the simplest style in case you had to make a repair in the field. Too complicated of a takedown system and once something goes wrong it’s useless until sent back to manufacturers. Again simple is best in my opinion.”
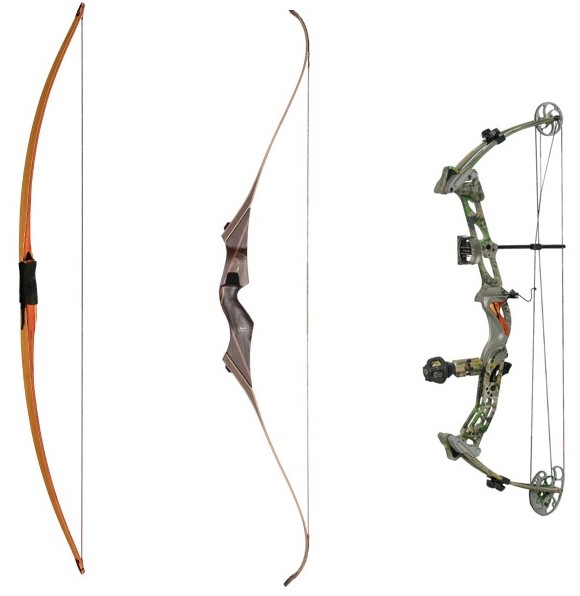
Longbow and Flatbow: A simple D-shaped, curved design, longbows are called such because they’re about as long as a human body. They take strength and skill to shoot effectively, but can also quietly dish out a great deal of power.
Similar in shape and design, though not as long, is the flatbow. Longbows and flatbows are carved from a single stave, with the flatbows being commonly made in the woods by survivalists:
Recurve bows are distinct for curves at the end of the limbs that curl away from the archer. These curves are used to provide as much power as a longbow but in a shorter overall package. Recurve bows tend to be easier for beginners, but can’t handle heavy arrows like a longbow can.
Compound bows are the modern version used by most hunters. They use pulleys (“cams”) to maximize power while minimizing draw weight. This also makes it easier to hold a draw for extended periods, such as when you’ve drawn but are waiting for the precise moment to strike.
Compound bows are incredibly powerful, but they’re also complicated and delicate — there’s no problem if you already have one or get one for normal-life use, but they’re considered too complicated to be appropriate for most preppers.
Parts of a bow
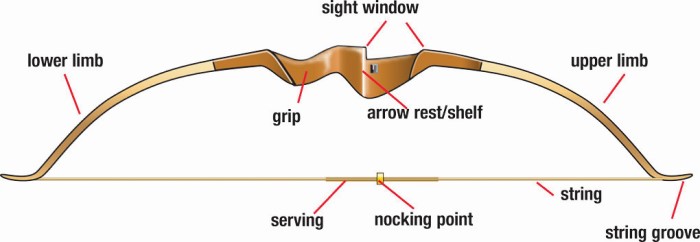
Limbs: The upper and lower pieces of the bow.
Riser: The middle section of a bow where you grip the bow and typically where the arrow rests.
Bowstring: The string that connects the upper and lower limbs. You pull the string back and release to launch an arrow. Historically, bowstrings were made from sinew or natural fibers, but these days they’re made of synthetics like Dacron, Dyneema, and Kevlar.
Nock: Confusingly, the nock refers to two things: the notch at the end of the arrow where it fits onto the string, and the notches on the ends of the limbs where the string attaches.
Nocking point: The place on the string where you typically seat the rear of the arrow. Most modern bows have a metal bead on the string called a nock-set that helps you consistently nock the arrow in the same place. The nocking point is usually wrapped in thread to protect the string, called serving.
Sight window: A cut-out area in the handle that makes it easier to see what you’re shooting at. Recurve bows tend to have a shelf at the bottom of the sight window where the arrow traditionally rests. On longbows, you traditionally use your hand as the shelf, wearing a glove to protect your hand from cuts.
Arrow rest: The arrow rest is wherever the arrow rests on the bow before and while firing. It could be your hand or the shelf in the sight window (if your bow has one). Some traditional archers apply leather to the shelf to protect the bow material, and those are often called arrow rests. Some arrow rests are simple stick-on hooks for the arrow to lay on. Compound bow hunters typically use more complex bolt-on rests like whisker biscuits and fall away (or drop away) rests.
What about crossbows for survival?
Until recently, the general advice was to avoid crossbows as a primary prep. They shoot bolts (arrows) well, but the majority of models out there are too heavy (6-7 pounds), are too difficult and take too long to reload, are mechanically complicated and hard to repair, etc.

In recent years, companies like Steambow have launched new crossbows that try to make the category more approachable and practical for normal people and their needs. There can even be some benefits — once the crossbow is cocked, for example, you don’t have to keep holding the tension back with your arms the way you do with a normal bow.
We hope this trend continues, and it could get to the point soon where there are a wide range of crossbows worthy of a spot in your preps.
Until then, avoid any of the Hollywood-style crossbows. Even the weight alone is a problem: If you instead carry a takedown Ruger 10/22 rifle with a red dot sight and whopping 500 .22 rounds, that whole kit still weighs less than a typical crossbow kit.
Hunting regulations around crossbows are often different from archery regulations. Some states consider crossbows to be archery equipment and some count them as firearms. You may only be legally allowed to take game with a crossbow if you’re disabled. As always, read your hunting regulations carefully.
What about arrows?
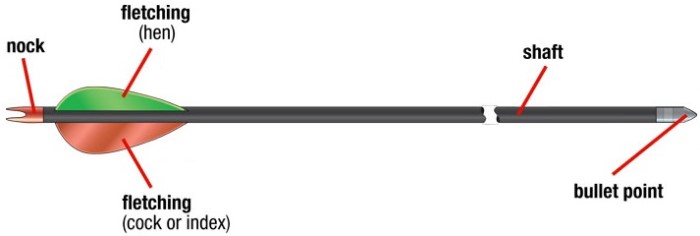
Arrows have four parts:
- Nock: The rear of the arrow features a slot, either cut into the arrow or as a separate plastic bit, which seats the arrow on the string. Some types of nocks lightly latch onto the string while others just sit on it.
- Fletching: Feathers or plastic fins that stabilize the arrow and help it fly straight. There are usually three: two “hen” feathers and a “cock” feather. When you shoot an arrow, you want to make sure the cock vane is pointed to the outside so it doesn’t hit the bow as it flies.
- Shaft: The shaft is the main body of the arrow. It’s crucial that the shaft be straight. Arrow shafts are typically made of aluminum, fiberglass, or wood.
- Tip or Bullet point: In most modern arrows, the business end screws off and can be exchanged with other tips to perform different functions.
A quiver is a bag or solid container that holds your arrows while you’re shooting. Traditional quivers go on your back or leg. Compound bow hunters typically attach a quiver to the bow itself.
There are two types of arrowheads: points and broadheads. Points, like bullet and field tips, are typically used for small-game hunting. Broadheads are mostly used for big-game hunting and are composed of multiple sharp points.
Arrow shafts can be made of various materials. For a survival bow, opt for either fiberglass or aluminum. Fiberglass is cheap, lightweight, and fairly durable. Aluminum shafts are much more durable, but are heavier and won’t fly as fast.
You can also make your own arrows, though it can be a painstaking process if you’re working from scratch, as Survival Lilly demonstrates:
TheElvenArcher shows an easier process using hardware store dowels, but it’s still a good deal of work:
How to string a bow
An essential skill for archery, especially when using a takedown bow, is stringing and unstringing the bow, which for traditional bows requires you to bend the limbs. It’s important to put equal pressure on the limbs so as to not crack them, so it’s best to use a tool called a bow stringer. Many bows include one, and the bow’s warranty may depend upon using it to string the bow.
Bow stringers are simple: it’s a string that attaches to both limbs so you can step on it and pull the bow to apply equal tension to the limbs. If you don’t have a bow stringer, you can “step through” the bow and use your legs to brace the limbs as you bend them. But the bow stringer is the best way. NUSensei demonstrates proper techniques:
Note that if you use a compound bow, this guidance doesn’t apply because the process is much more complicated. You ideally want a device called a bow press to properly do the job. Or you can take it to a professional.
Bow accessories and maintenance
Experts recommend never dry firing a bow, which means drawing and releasing the string without an arrow. Without the arrow to take in that energy as it starts to fly, the bow itself will take the brunt of the force. Besides obviously breaking something, it can create smaller unnoticed fractures in the components that randomly fail later on.
Beyond that, the best thing to do is take care of your bowstring. Keep an extra string in your kit, and always check your string before use. Replace it when it starts looking frayed.
To keep your bowstring in good shape for as long as possible, you need to wax it. String wax comes in a tube — like lip balm — and it works pretty much like lip balm: rub the wax on and then rub it into the string with your fingers. Do that every time the bow is used and the string will last much longer.
Consider keeping an arm guard, like the Goabroa Archery Arm Guards, with the bow, which is a small piece of armor that straps to your forearm and protects it from being snapped by the string. That shouldn’t happen with proper technique, but stuff happens and it can be incredibly painful, especially if the string has a bead on it.
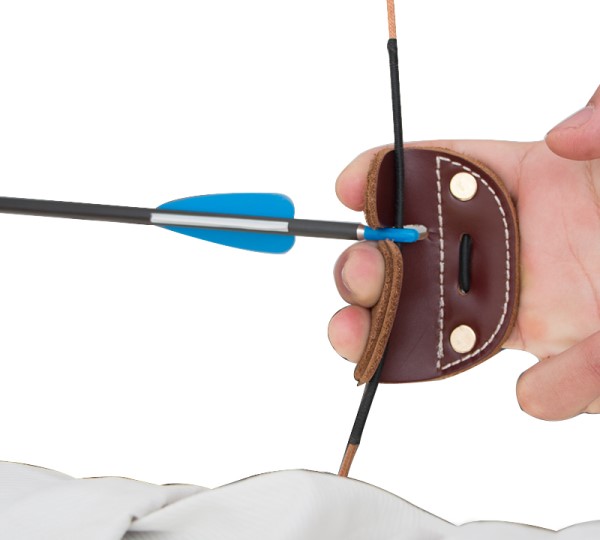
Pulling the string can be harsh on fingers, and there are a few solutions to that. One is tabs, like the Hide & Drink Rustic Leather Archery Finger Tab, which are little pieces of leather that go between your finger and the string.
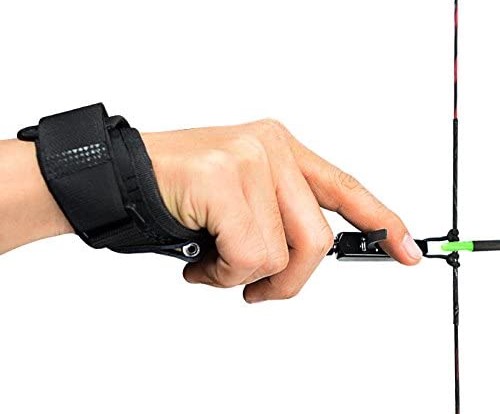
Another finger-saving device is called a release, such as the TruFire Edge, which straps to your arm and clips onto the string. You then pull the string back with the release and pull a trigger to release the string.
Releases are typically used with compound bows. Traditional archers prefer bare fingers or tabs. But releases work just fine with longbows and recurves.
Speaking of saving fingers, if you carry broadheads in the field, you need a tool to safely attach and detach them from arrows. The Work Sharp Guided Field Sharpener includes a broadhead wrench and can be used to sharpen your broadheads, as well as knives and other bladed instruments in the field.
